


Stone decorate
Make nice scenes on a stone.
Sometimes you find beautiful stones, and you see something nice in it ...
Unfortunately I didn't take a picture of what the stone was like first
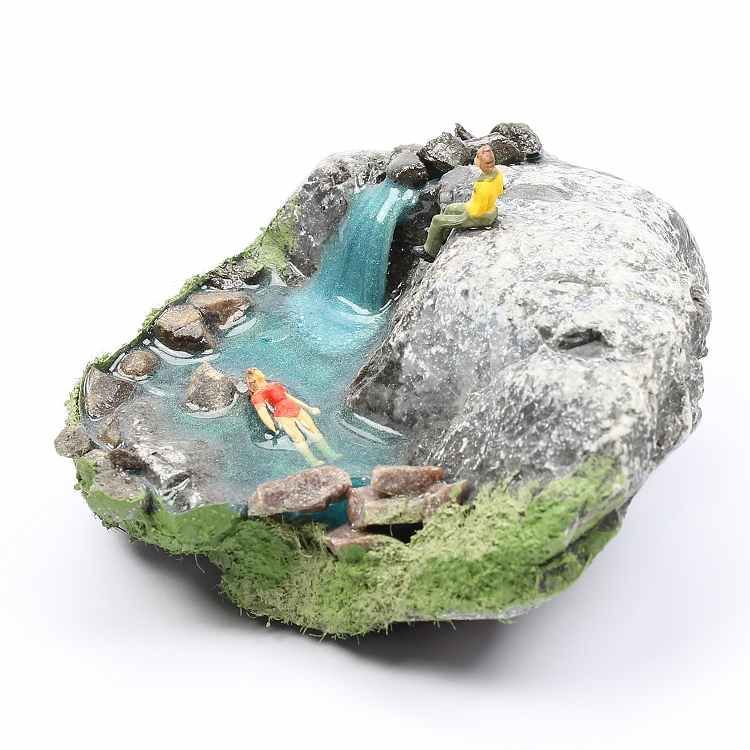
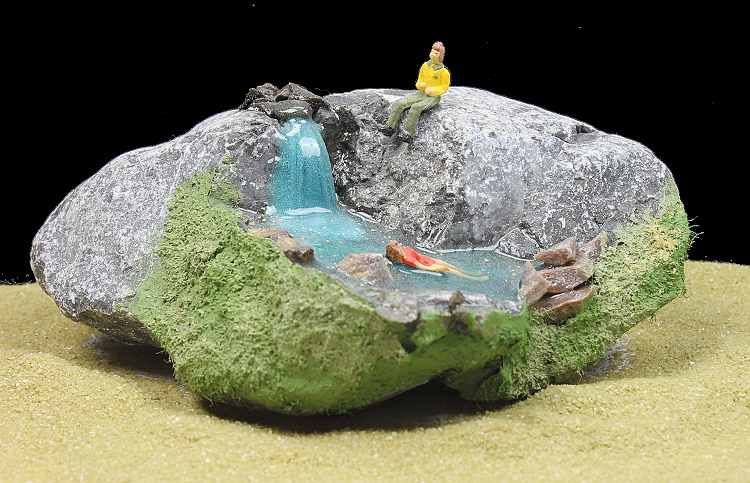
With this stone I immediately had an idea to use it with mini figures, and I immediately saw a water in it.
Here you can cool down in the summer.
Hubby delicious on the edge morning and enjoying the beautiful view, and I cool down in the beautiful blue water.
Delicious such a day ...

What do you need?
A random stone where you see a nice scene.
I made small pebbles of another stone by breaking them with a hammer.
Miniature dolls, acrylic paint, moss effect paint, yarn for the waterfall and of course epoxy.
At the bottom of this message you will see a shopping list.
How do you proceed?
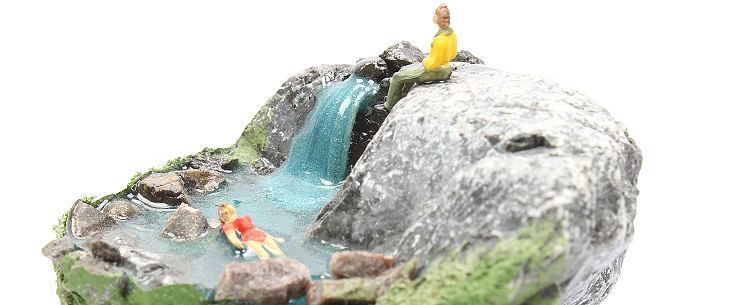
I started to make the waterfall, this is the most work of all.
Apply pieces of yarn with some glue to the stone in the form of a waterfall.
This does not have to look neat at all, because there is still a layer of epoxy over it.
Then the dolls painted with acrylic paint.
Make sure you use a somewhat thinner acrylic paint, I used the Pebeo paint myself.
If the paint is thinner you can paint small things more easily.
I taped the side of the stone with tape so that I could pour some epoxy into it,
Without everything flowing immediately.
But with a stone that is a bit difficult, so I have put a silicone container mat under it.
With UV Epoxy I attached the stones on the side, I chose this because it gets hard much faster.
You shine with a UV lamp until the epoxy hardenes and that goes pretty quickly.I started to make the waterfall, this is the most work of all.
Apply pieces of yarn with some glue to the stone in the form of a waterfall.
This does not have to look neat at all, because there is still a layer of epoxy over it.
Then I filled the lake with normal epoxy and put the stone in such a way that not everything runs out, this is a bit of a puzzling how you can best put this down.
At the moment I also put myself in with a stone behind my head so that I do not go under.
(You can also do this a little later if the epoxy is already thickening something)
Let everything dry well, I put it aside for a few days.
Then created a little epoxy, and colored blue, and let it thicken before I started the waterfall.
When it really became syrupy, I always let a little epoxy walk down.
You have to sit in front of this, then you get the best result.
You can also use UV Resin then this process goes a bit faster.
After this you let everything dry again very well.
After a few days I still glued the stones upstairs with UV Resin at the top of the waterfall.
Also on the sides still stuck here and there, so that it is a bit nicer finished.
With Pentart Grass and Moss Effect, I have processed the stone at the front, so that it looks like there is really moss growing.
And your ugly edges of your epoxy have also been completely eliminated.
This is really great stuff.
My man gave a nice seat and ready is my summer scene.
sunny greetings Agnes
More hobby ideas? Read more